Getting started with Support Alerts: a complete walkthrough
Support Alerts turns Intercom events — a new conversation, a customer reply, an SLA about to breach — into real-time notifications your team actually sees, in Slack or by email. This guide walks through the whole setup, from the first install to fine-tuning who gets notified about what.
Step 1: Connect your Slack workspace
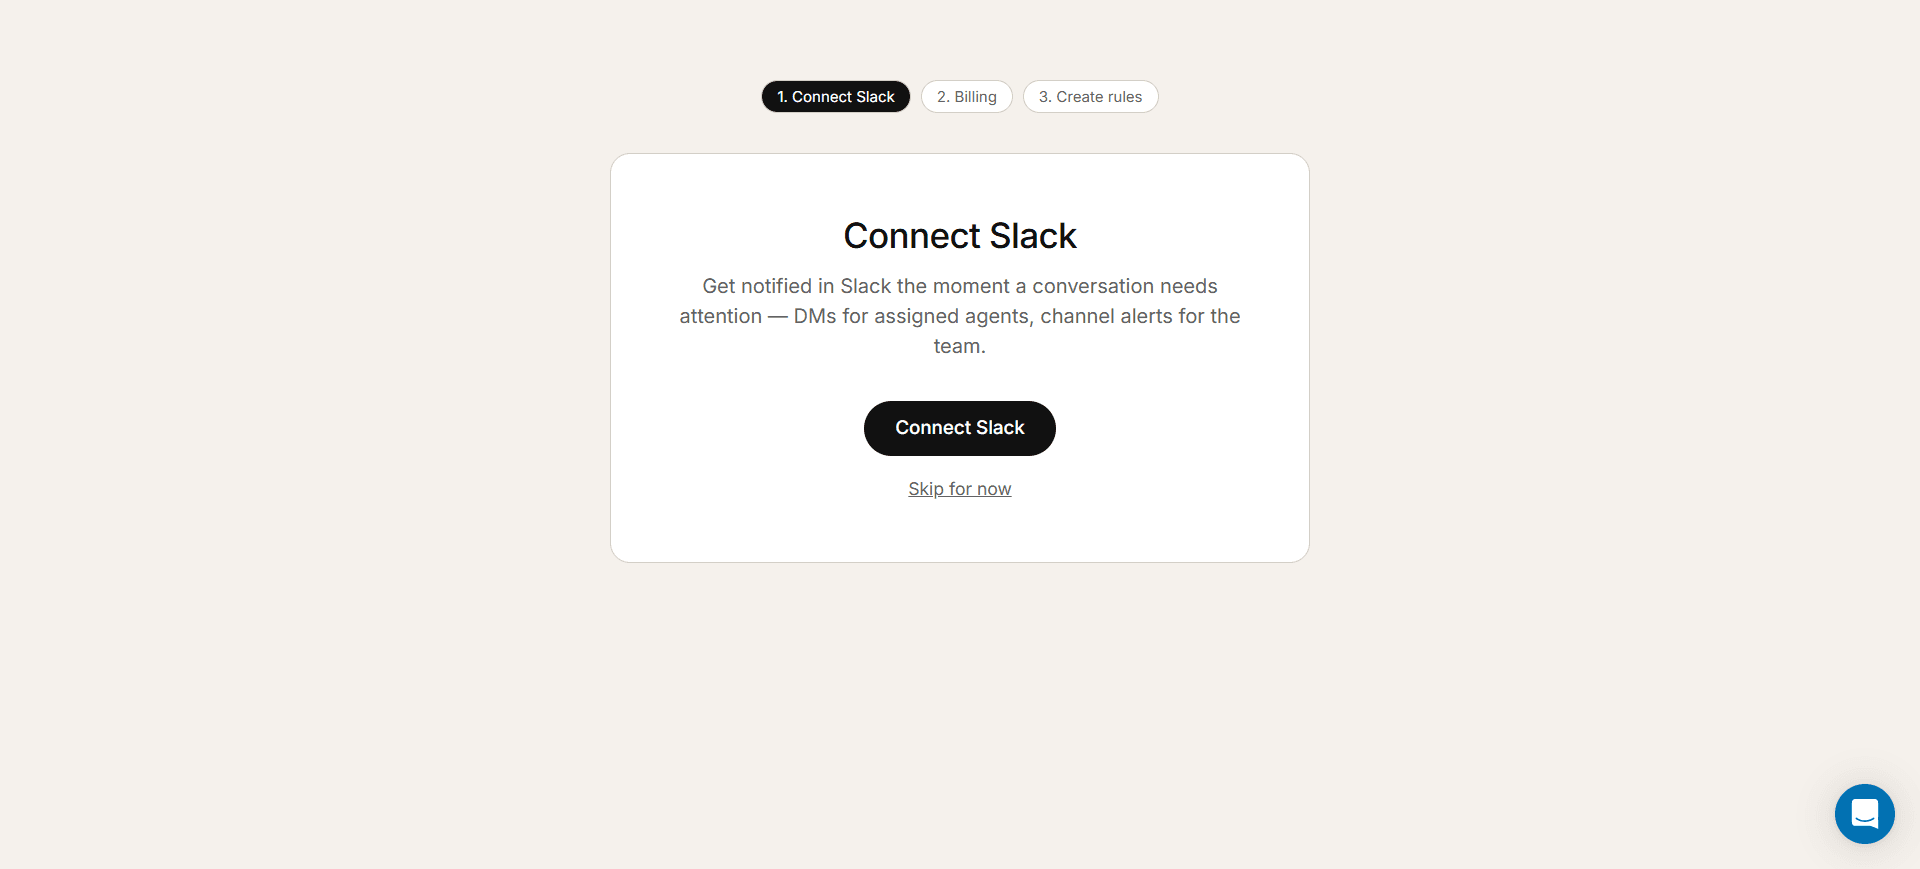
When you first install Support Alerts, you'll be asked to connect a Slack workspace. This is what lets the app send direct messages to agents and post alerts into shared channels. Click "Connect Slack," choose the correct workspace from Slack's permission screen, and approve the request. If you'd rather do this later, you can skip it for now — everything else in the setup still works, and you can connect Slack at any time from the settings dashboard.
Step 2: Pick a plan
Next, you'll choose a plan based on how many agents are on your team. You can switch plans at any time later from Settings → Billing, so don't overthink it at this stage — pick what fits your team size today and adjust as you grow.
Step 3: Review your starter rules
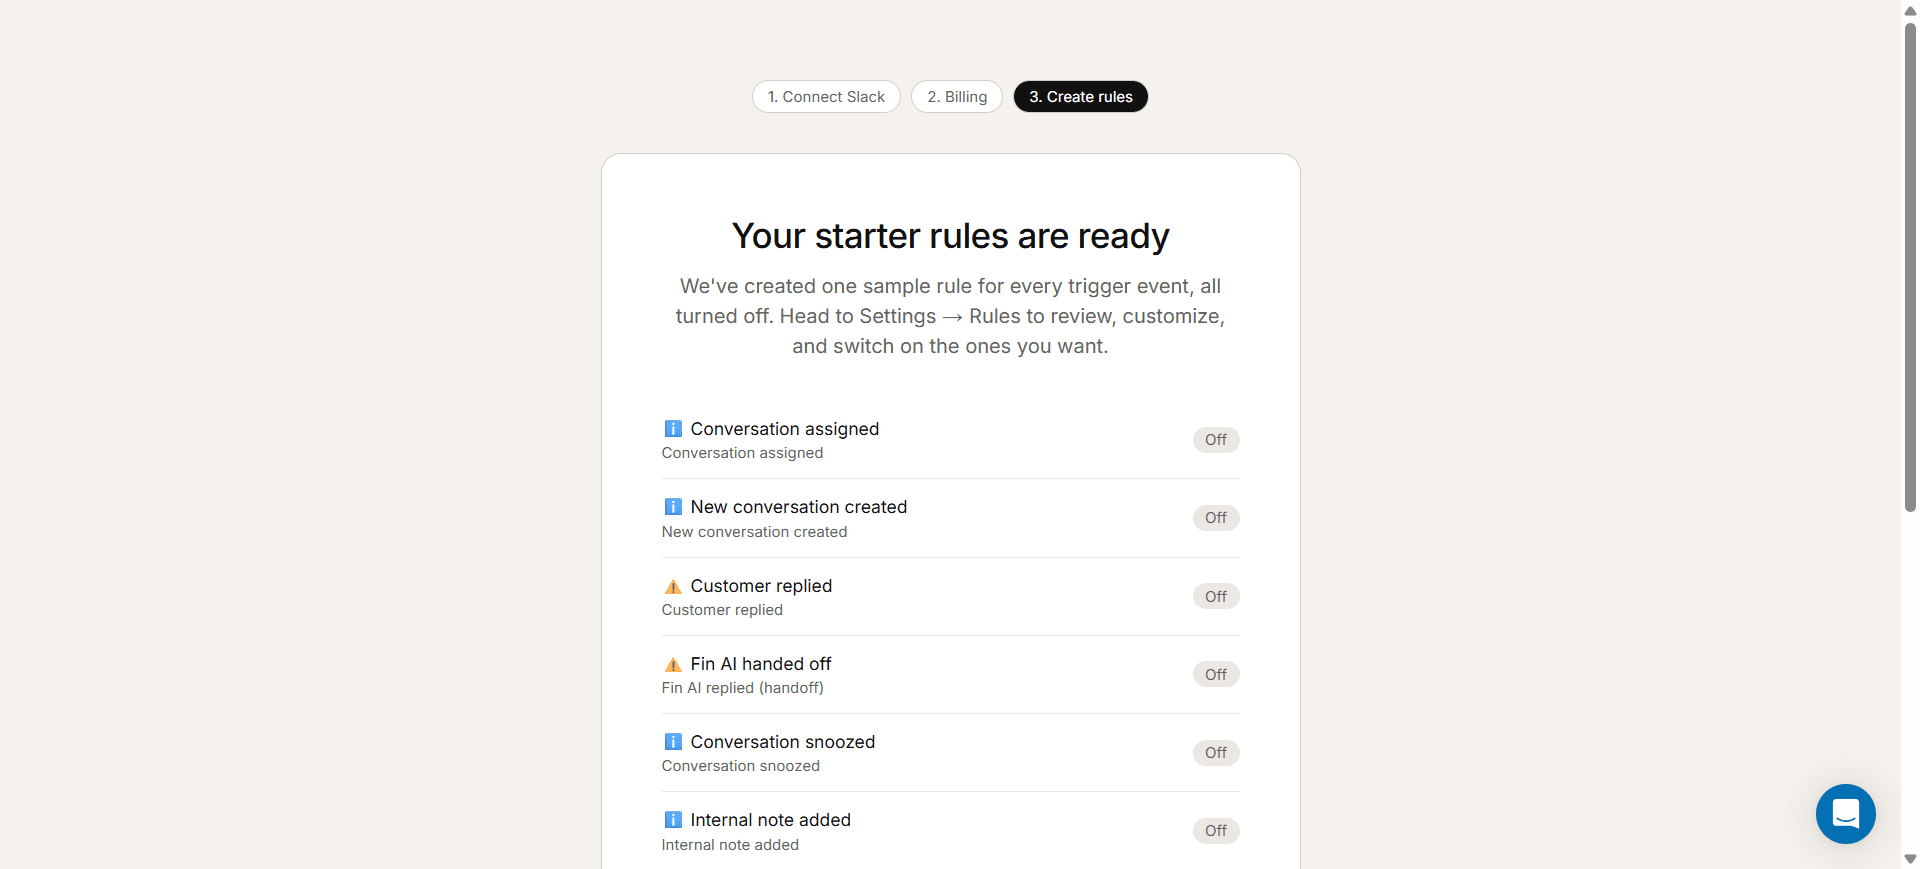
Once setup is complete, Support Alerts creates one starter rule for every trigger event — ten in total — all switched off by default. Nothing fires until you turn rules on, so take a moment to skim the list and get a feel for what's available before diving into the settings dashboard, where you'll actually configure everything.
Finding your way around the settings dashboard
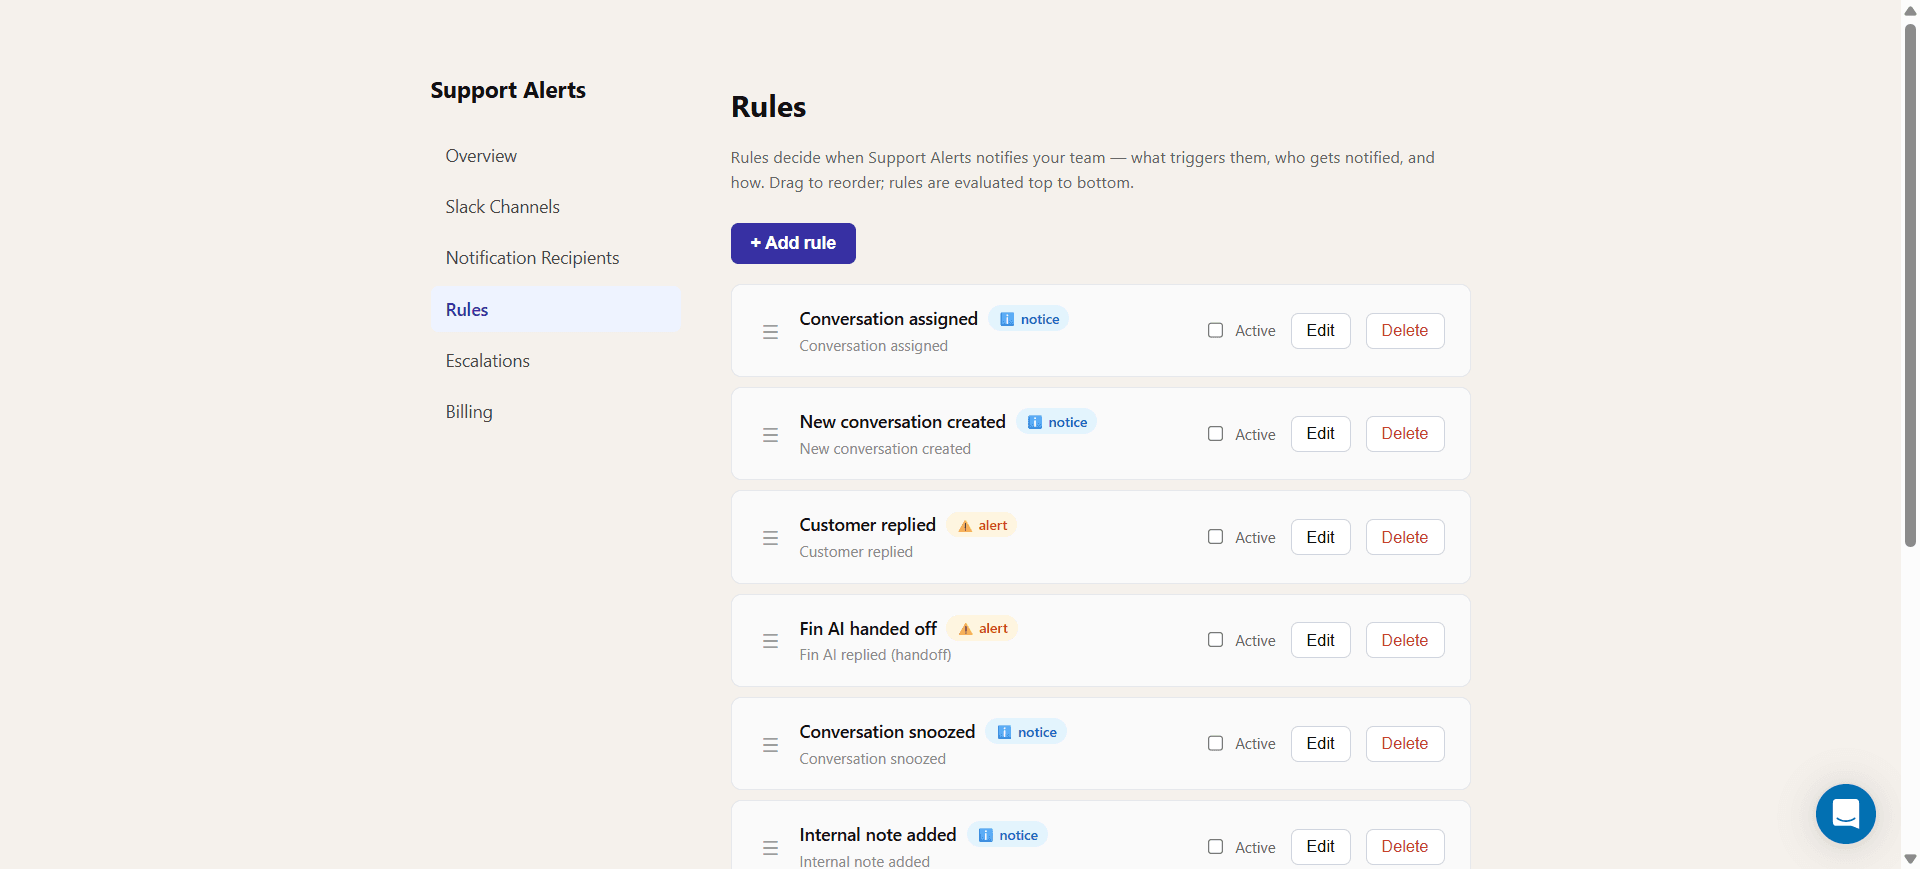
Everything you'll do day-to-day lives in the settings dashboard, reachable from inside Intercom. The sidebar has a few key pages: Rules, where you create and edit alert rules; Slack Channels, where you decide which channels receive which alerts; Notification Recipients, where you decide which teammates get pinged; and Escalations, where you set up backup notifications if an alert goes unacknowledged.
Setting up Slack channels
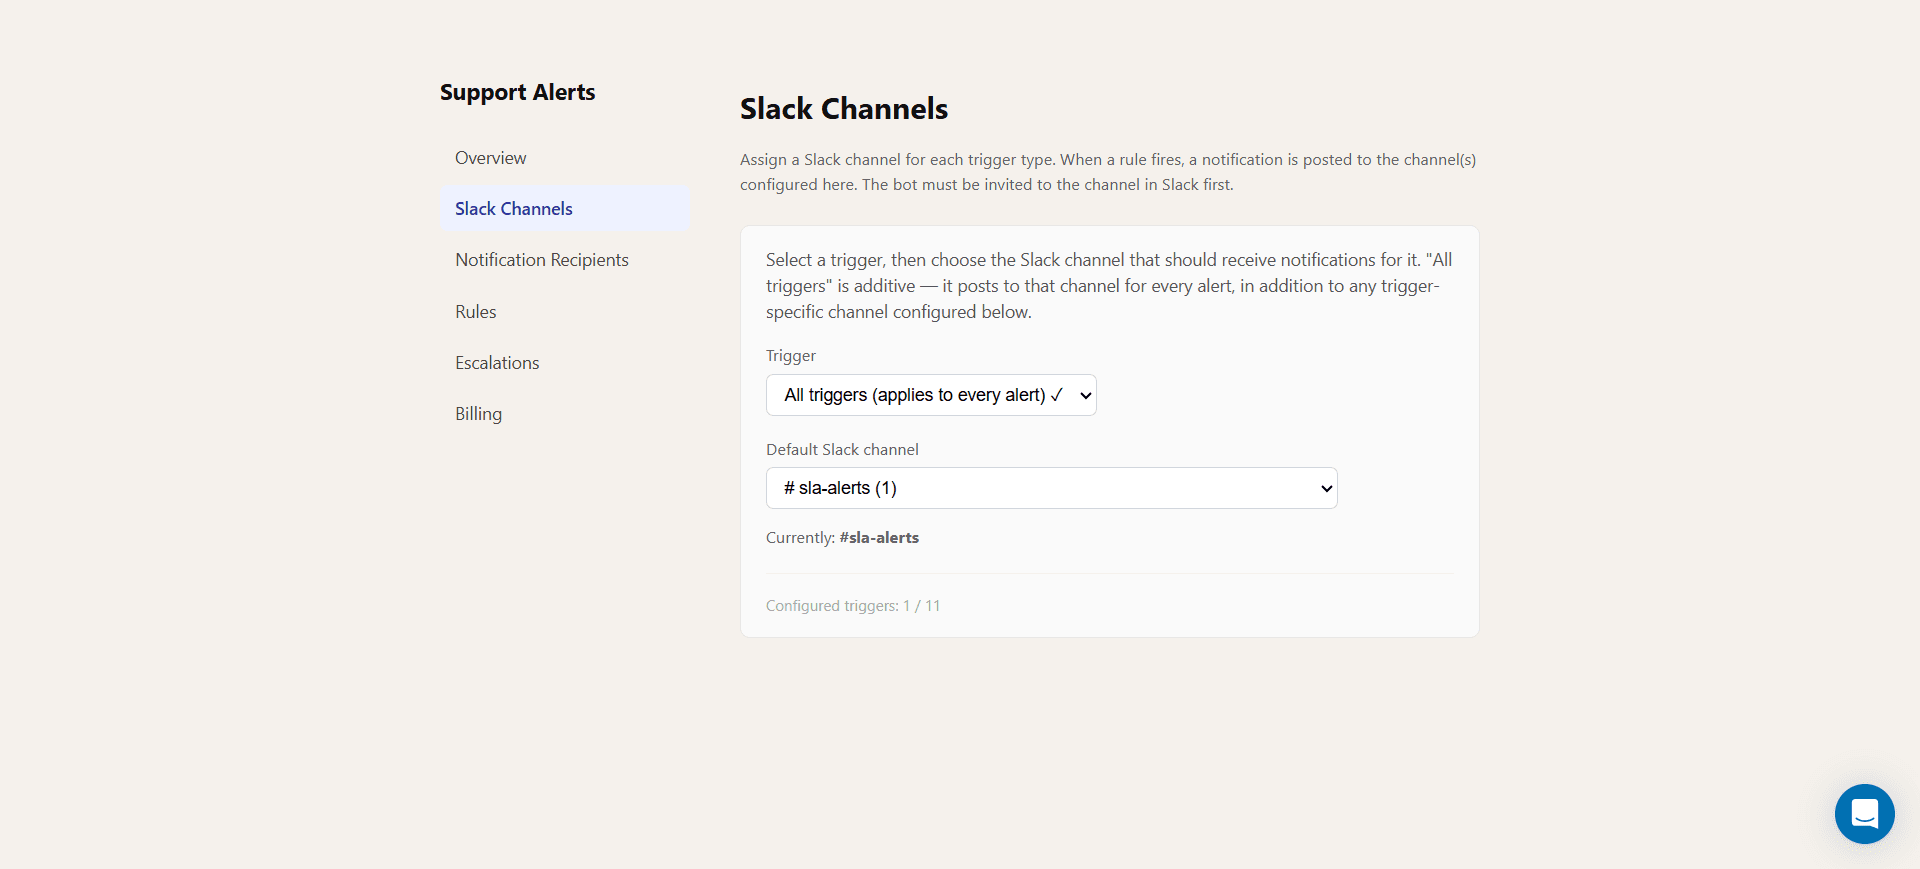
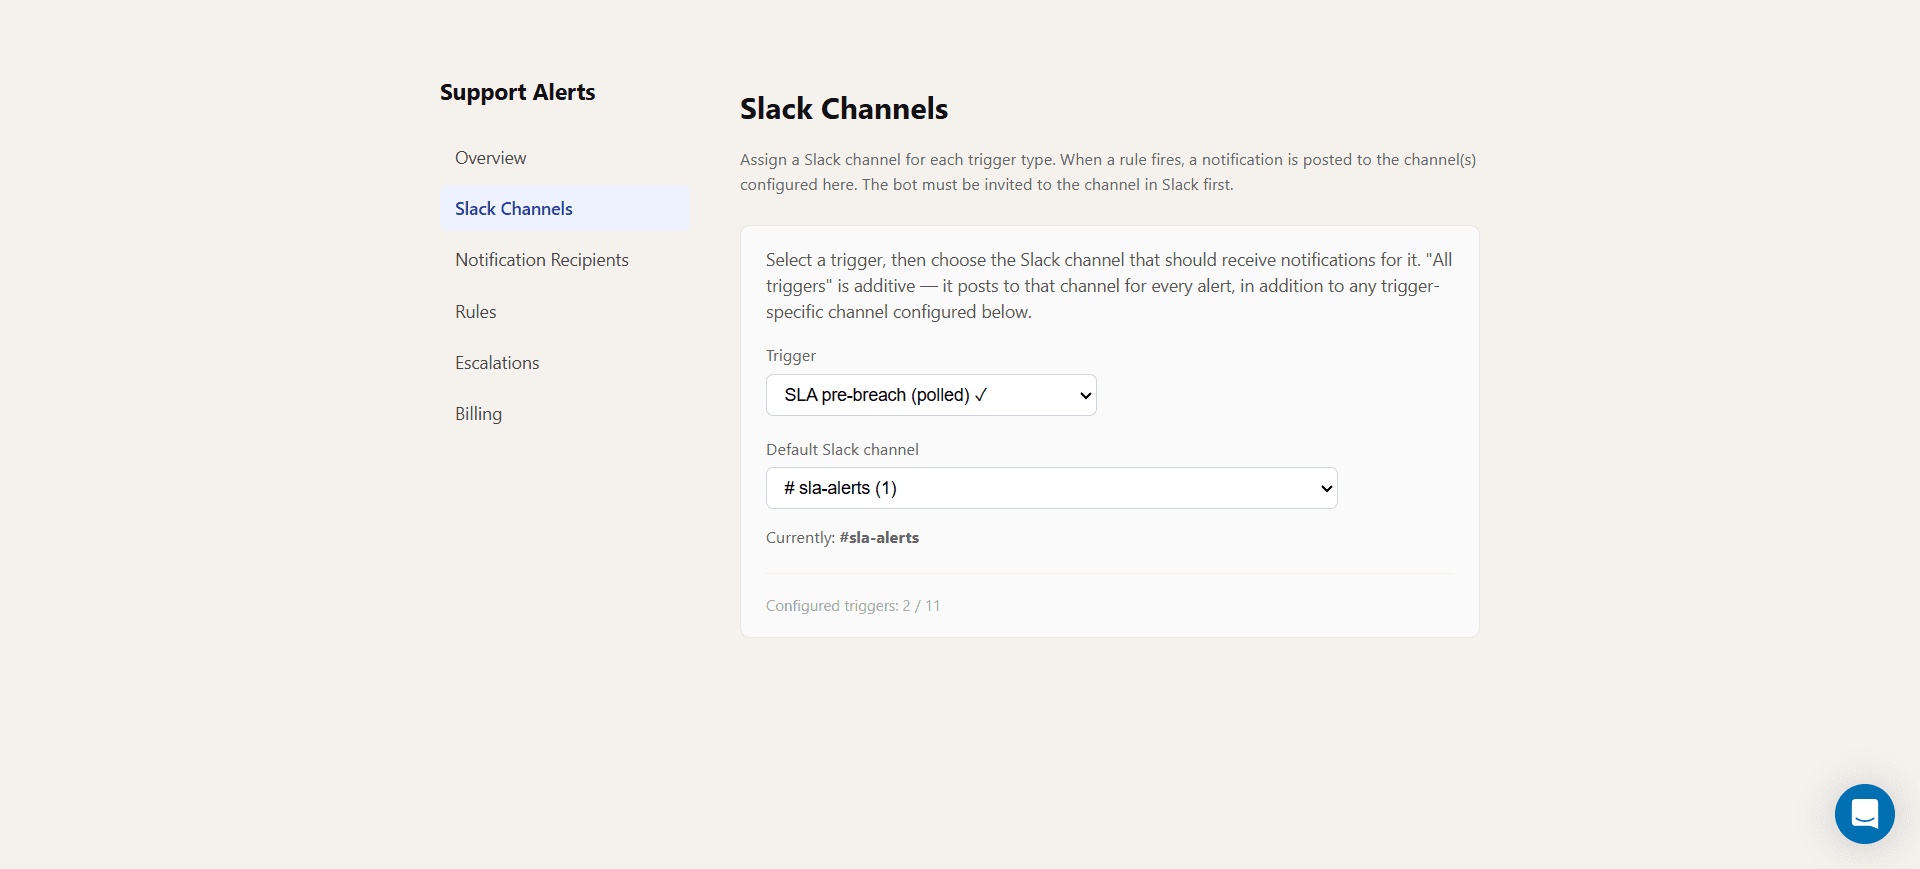
Before alerts can land in a Slack channel, two things need to happen. First, invite the Support Alerts bot to that channel in Slack — type /invite @Support Alerts in the channel, or add it via the channel's integrations menu. Second, tell Support Alerts which channel to use, on the Slack Channels page.
You can set a default channel that applies to every trigger — handy for a general #support-alerts channel that catches everything. On top of that, you can pick a different channel for specific triggers. For example, send everything to #support-alerts by default, but route "SLA about to breach" and "Priority changed to urgent" alerts to a dedicated #support-urgent channel as well. Both channels will get a copy — the per-trigger setting adds to the default, it doesn't replace it.
Creating and customizing rules
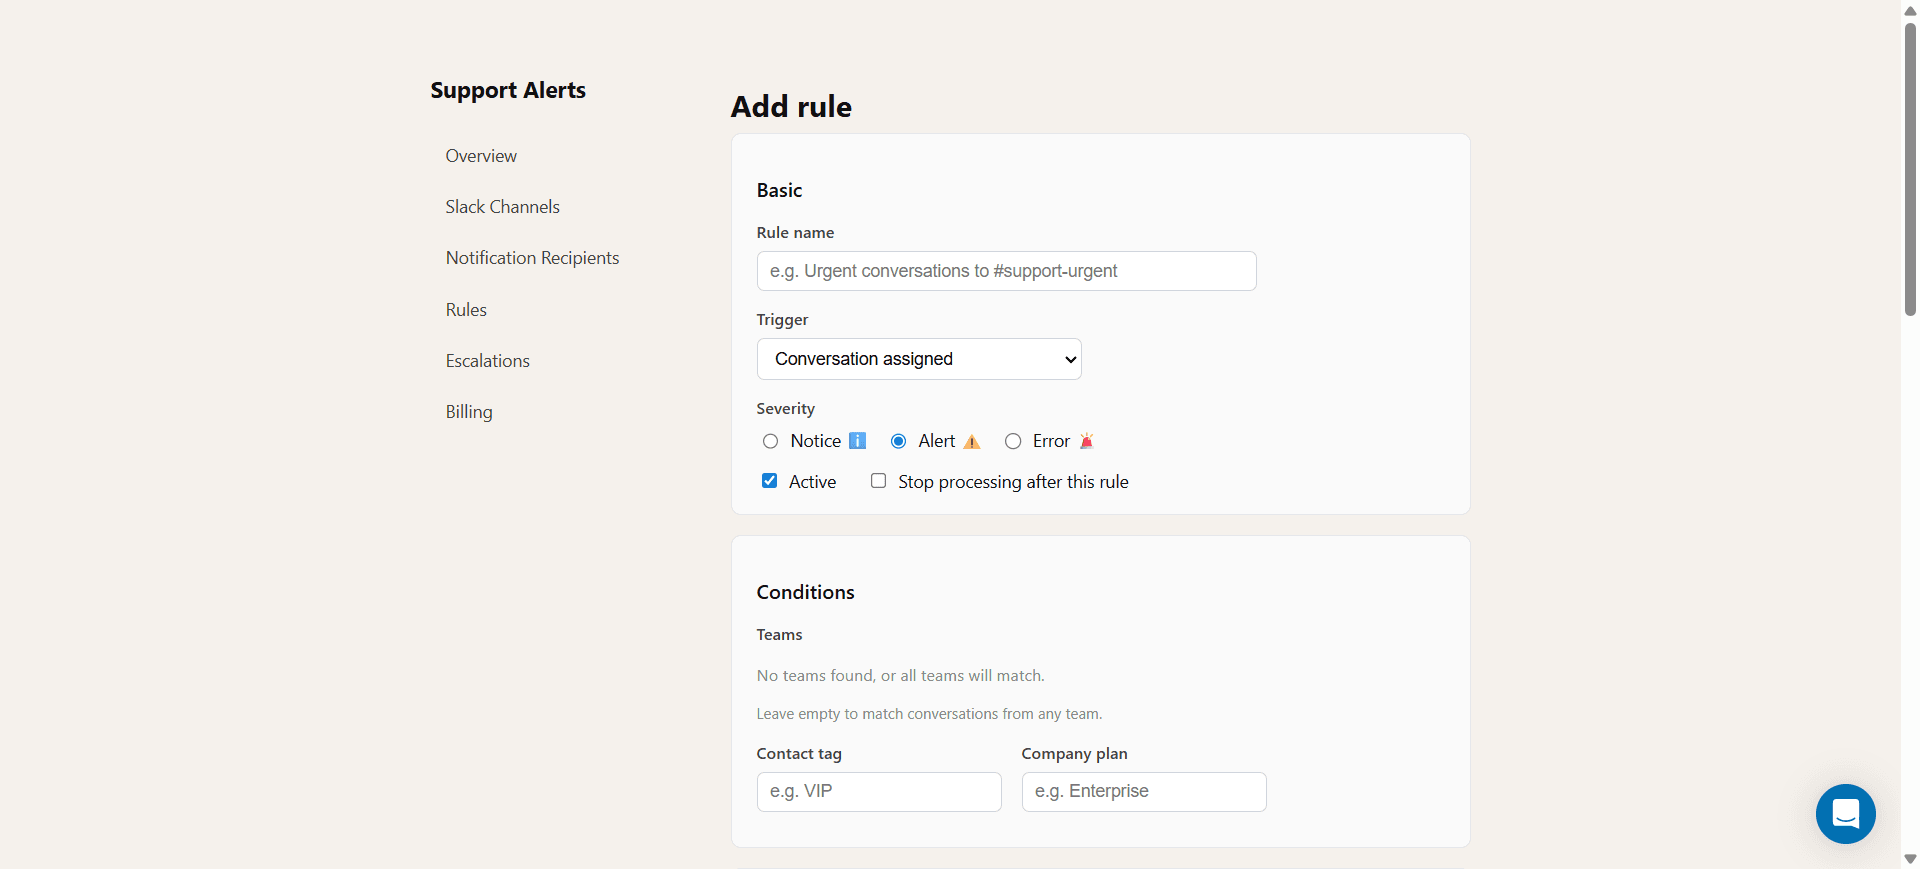
Rules are the heart of the app. Each rule says: when this trigger fires, with this severity, send this message, to these people, through these channels — but only at certain times. Click "Add rule" (or edit one of your starter rules) to open the rule editor.
- Trigger — choose from ten events: new conversation, conversation assigned, customer replied, Fin AI handed off, conversation snoozed, internal note added, negative CSAT rating, priority changed to urgent, conversation idle, or SLA about to breach.
- Severity — Notice, Alert, or Error. This controls the icon and color shown in Slack and in your notification history, so the most urgent alerts stand out.
- Conditions — optionally restrict the rule to specific teams, contact tags, or company plans, so it only fires for the conversations that matter.
- Message template — write the message agents will see, using variables like {{customer_name}}, {{conversation_url}}, and {{assignee_name}} that get filled in automatically. A live preview shows exactly what the message will look like.
- Delivery — decide whether to notify specific agents or whoever the conversation is assigned to, and whether the alert goes out as a Slack DM, a Slack channel post, an email, or any combination.
- Scheduling — restrict the rule to certain days and hours, and set a cooldown so the same conversation doesn't trigger repeat alerts too quickly.
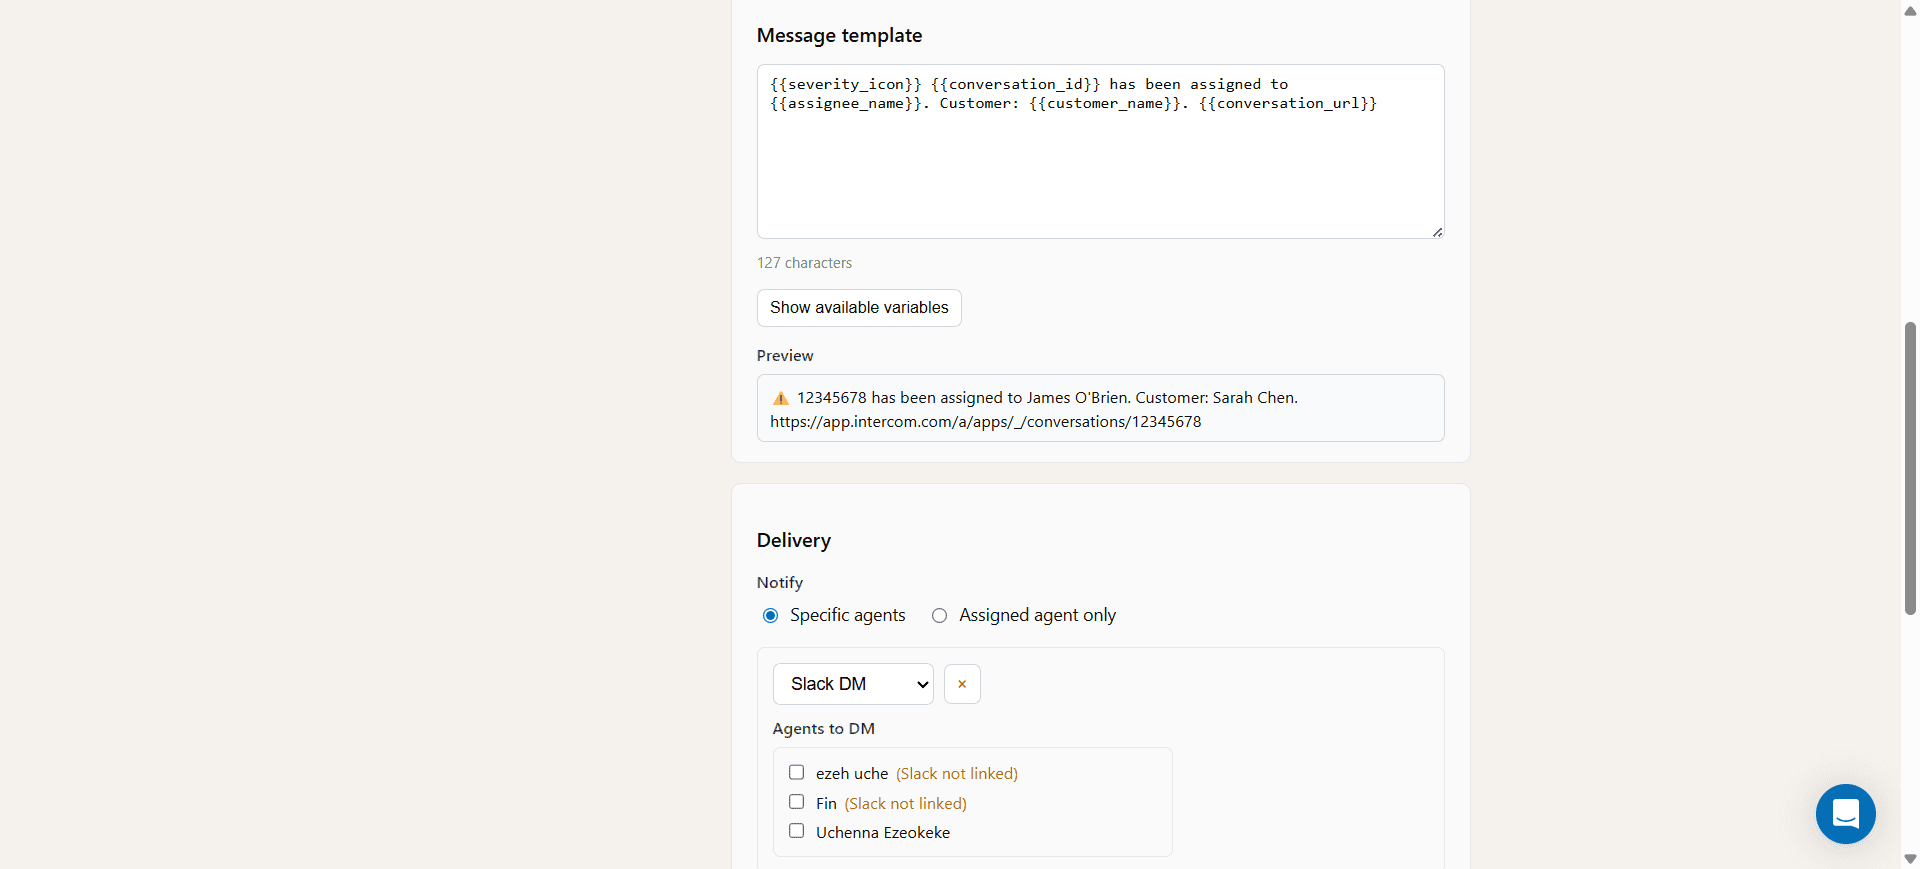
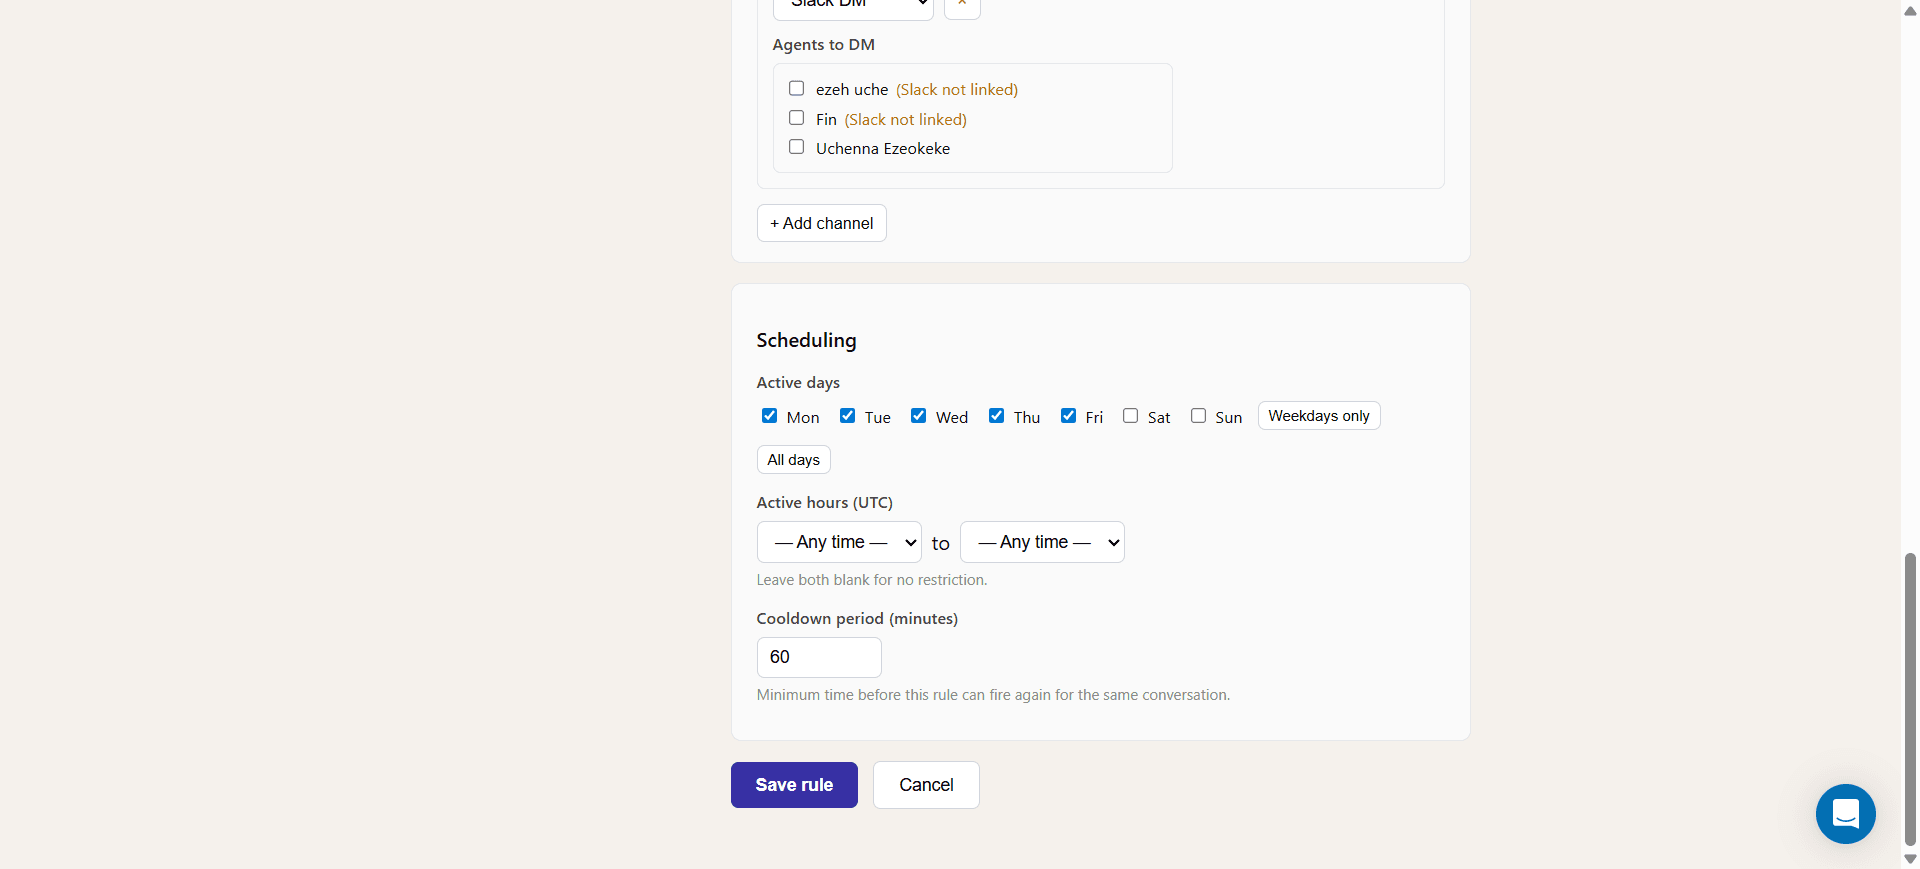
When a rule's delivery is set to "Slack Channel," it uses the channel you configured on the Slack Channels page for that trigger (or the default channel, if no specific one is set). When it's set to "Slack DM," it sends directly to the agents you tick in the rule — but those agents need to have connected their own Slack account first (more on that below).
Choosing who gets notified by default
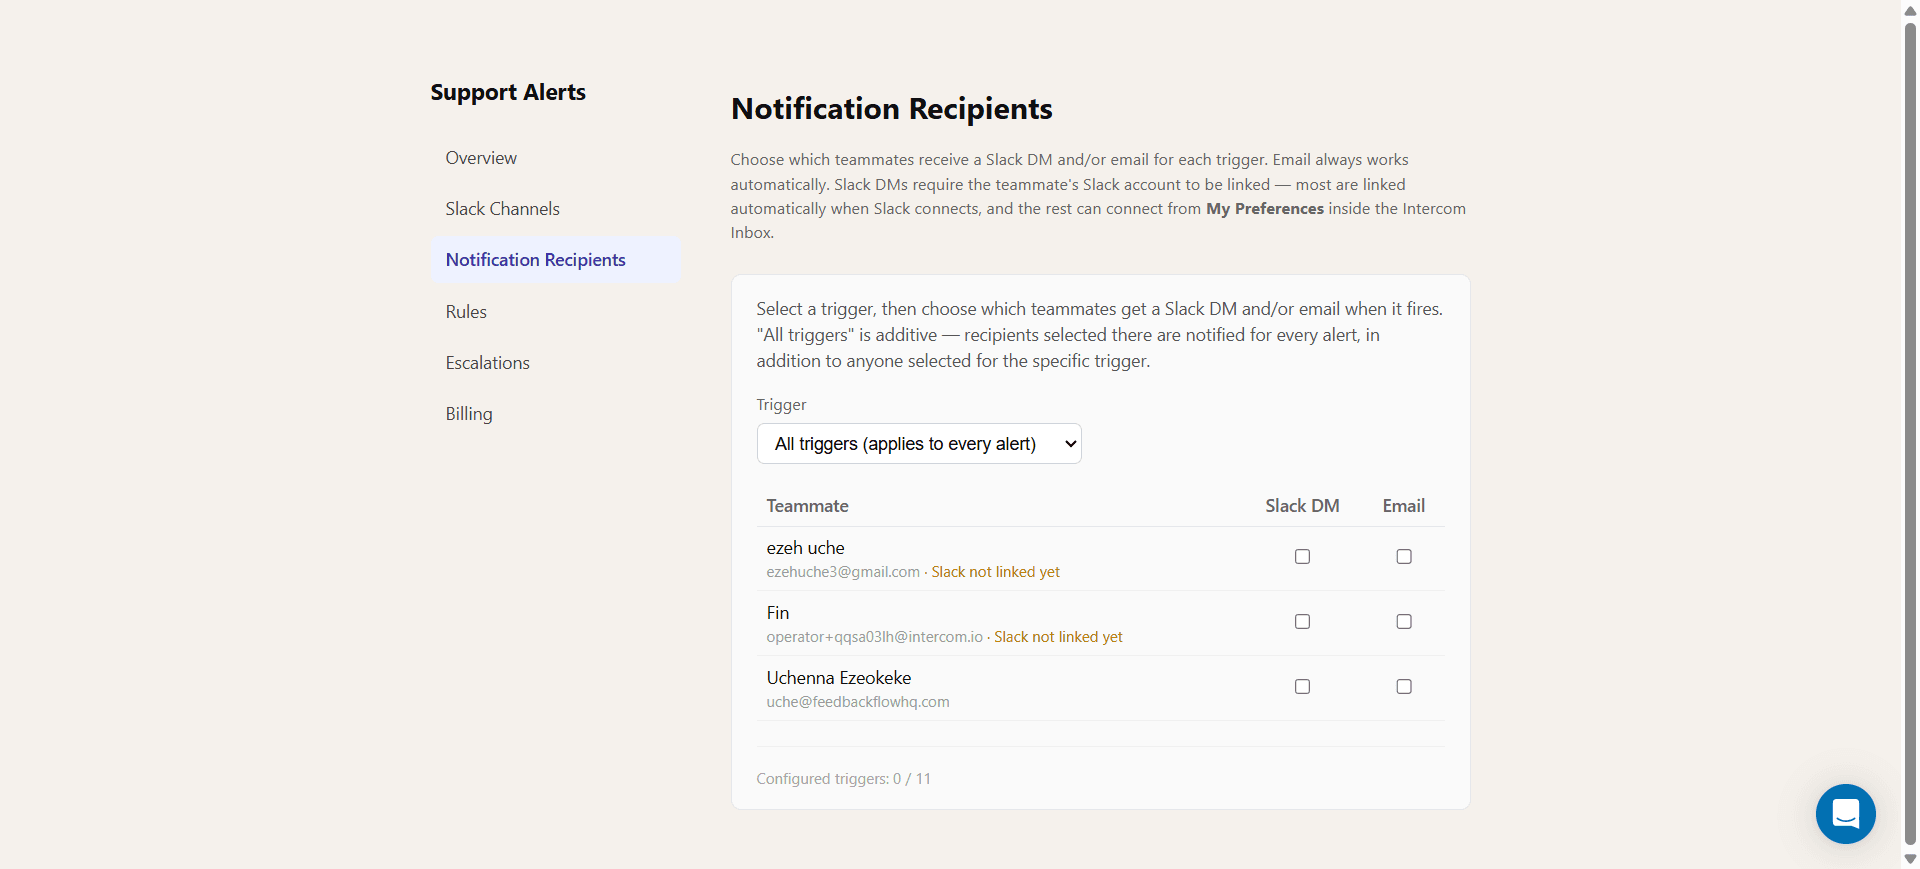
The Notification Recipients page is a simpler, workspace-wide way to manage who hears about what. For each trigger — or for "All triggers" at once — tick which teammates should get a Slack DM and/or an email. Anyone selected under "All triggers" is notified for everything, in addition to anyone selected for a specific trigger. Think of this as your "always loop in these people" list, separate from the fine-grained per-rule delivery settings.
Setting up escalation chains
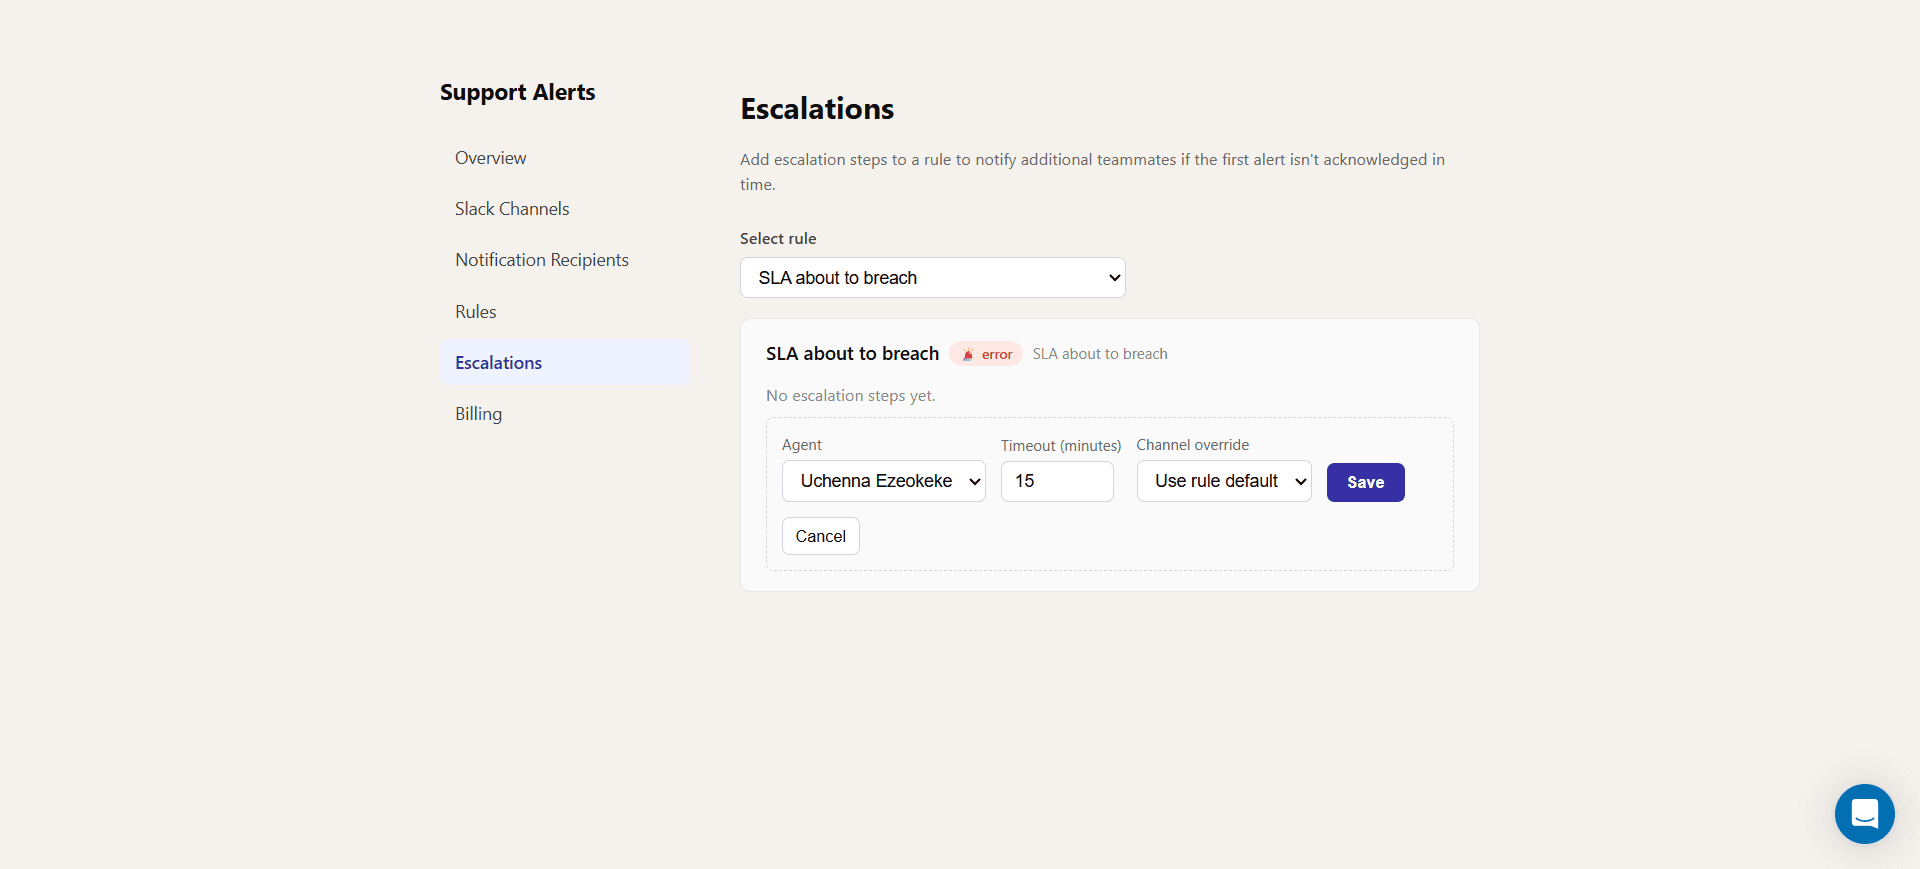
Escalations are your safety net. On the Escalations page, pick a rule and add one or more steps: each step names an agent, a timeout in minutes, and optionally a different channel. If the original alert isn't acknowledged within the timeout, the next step fires automatically — for example, escalating from the assigned agent to their team lead after 15 minutes, and to a shared channel after 30. Escalations are available on the Pro plan (up to three steps) and Business plan (unlimited steps).
Every agent connects their own Slack account
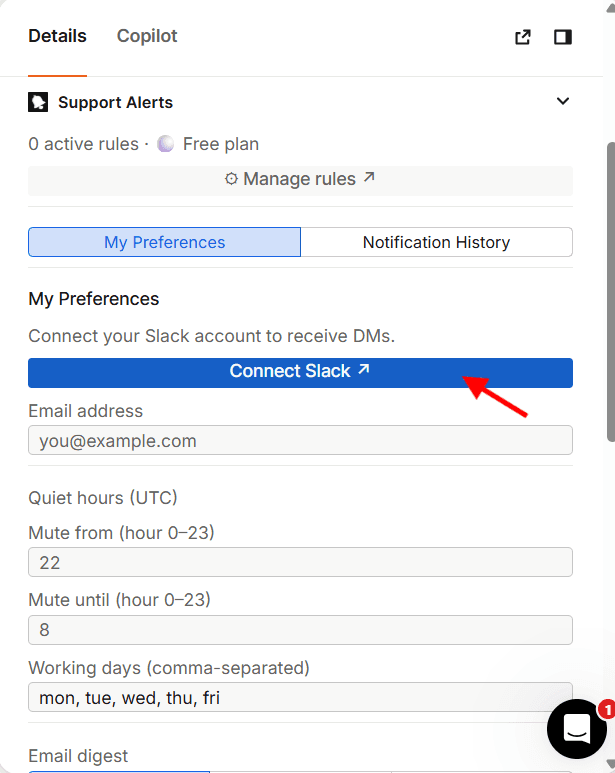
Connecting the workspace to Slack (step one) links the team as a whole, and usually links most agents automatically. But for Slack DMs to reach a specific person, that person needs their own Slack account linked too. Each agent can do this themselves from the Support Alerts panel in the Intercom inbox sidebar, under "My Preferences" — just click "Connect Slack" and approve the prompt. If you see "Slack not linked yet" next to someone's name on the Notification Recipients or Rules pages, that's the fix.
The same "My Preferences" panel lets each agent set their own quiet hours (so they're not pinged overnight), working days, and email digest frequency — so notifications fit around their schedule, not just the team's.
Acting on alerts: the Notification History tab
Next to "My Preferences" in the inbox sidebar is the Notification History tab — a running log of every alert, with its trigger, severity, and status. Each entry links straight to the relevant conversation. If an alert hasn't been handled yet, you'll see Acknowledge and Dismiss buttons — using either one stops any escalation steps from firing for that alert, so your team only escalates the things that genuinely need it.
Putting it all together
A typical setup looks like this: connect Slack, turn on the rules that matter most (SLA pre-breach and negative CSAT are good places to start), point them at a shared channel via Slack Channels, add the people who should always know via Notification Recipients, and layer escalation chains on top of your highest-severity rules. From there, it's mostly a matter of tuning — adjusting cooldowns, schedules, and message wording as you learn what your team actually needs to see.